
Complete Guide to Starting Seeds
Cultivating successful harvests from seeds can be overwhelming and difficult in the beginning. But with this guide, we hope to help even the most novice gardener accomplish starting their own seeds. In this blog, we’ll cover pre-soaking and pre-sprouting techniques, the proper procedure for transplanting, and separating seedlings, and how to start plants indoors.
PRE-SOAKING & PRE-SPROUTING
First, pre-soaking and pre-sprouting are great ways to test for seed viability and increase the success rate of certain crops. Pre-soaking and pre-sprouting are also helpful in sweltering months like August where over-watering is more common and can cause seed rot or in months with a shorter planting window.
Seeds typically sprout within a few days, much more quickly than in a garden bed, so this method is handy and efficient. These methods work best on big seeds and transplants since smaller seeds tend to clump together with the soaking method. However, with a little planning small seeds can thrive as well. We recommend using a Tupperware lid with ridges, placing the seeds between two pieces of cotton fabric, and then saturating well when working with small seeds.
Pre-sprouting is fairly simple and can be achieved in just a few steps:
Step 1: Line your container with a paper towel.
Step 2: Label your containers. Very important for keeping track of viability and seed type.
Step 3: Dampen your paper towels (or soil)
Step 4: Add your seeds.
Step 5: Place the seeds in a warm area.
Step 6: Check the seeds daily.
Step 7: Planting germinated seeds.
Step 8: Keep your seedlings warm and moist
Don’t forget to drain out water but leave your lid cracked while still covering your container to retain plant moisture. Rinse your seeds every day until they sprout (don’t get discouraged if they take a few days to sprout!).
Don’t forget to have your garden space prepped and ready to go so that you can transplant right away. We don’t recommend pre-sprouting seeds that produce edible roots, however, you can pre soak seeds with edible roots for one day.
The first sign of a successful pre-sprout is the emerging root and secondarily, the Cotyledons, or the first two tiny leaves to sprout from a seed after the root. Once they sprout, get them into your garden! If your seeds end up being nonviable, throw them outside for the wildlife to enjoy and you never know you may end up with a plant or two that takes anyway!
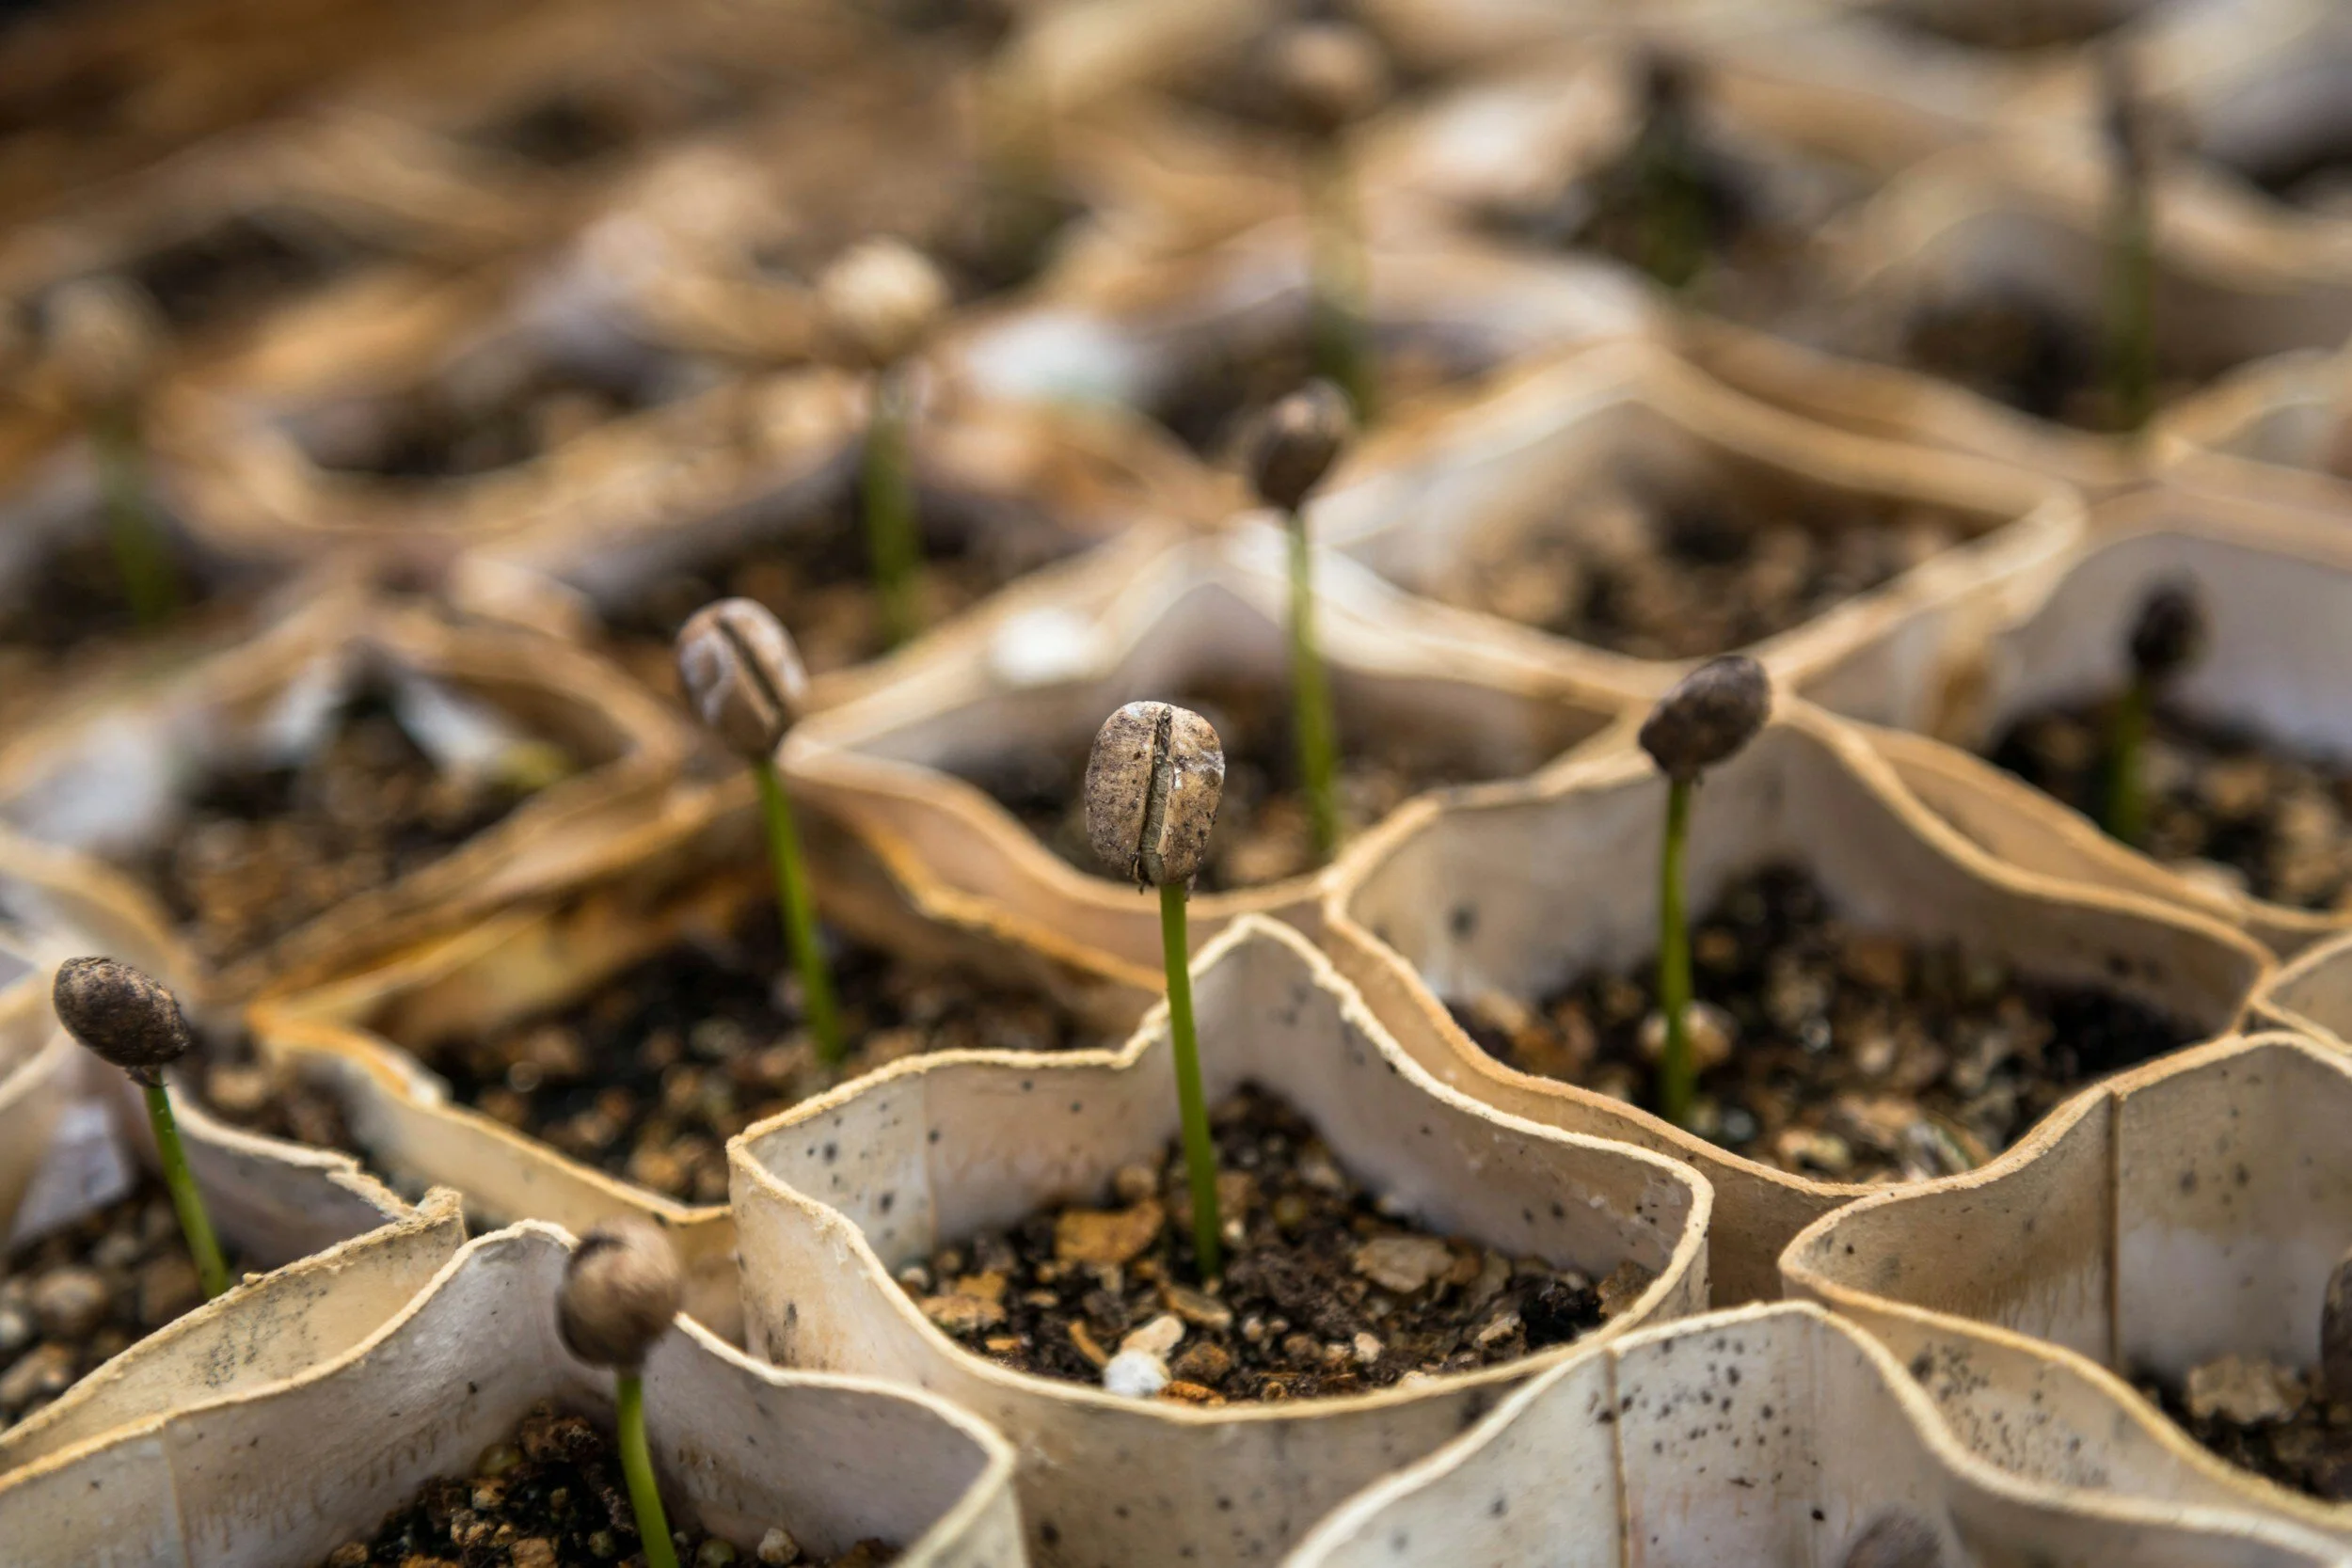
STARTING SEEDS INDOORS
Next, we’re covering starting seeds indoors. Starting seeds indoors gives your vegetables, herbs, and flowers a head start so they can grow larger and have better (and longer) harvests or flowering periods.
Starting seeds indoors and having them transplant-ready is a far more difficult undertaking than pre-soaking or pre-sprouting. It’s also not an essential step as Rita’s Roots has plant sales that are timed with the appropriate planting season.
Two of our favorite resources are the Johnny Seeds seed catalog and the Seed Starter’s Handbook. Johnny Seeds seed catalog has a transplant vegetable timetable from sowing to transplant. You can use that information to back-calculate when you need to start your plants indoors. For example, Lowcountry cool weather plants are planted at the end of February. Cool-weather plants need about six weeks to mature, so six weeks before the end of February is mid-January.
To start your planting you’ll need planting trays or egg cartons. If the planting trays have been used before don’t forget to sterilize them to prevent old bacteria and fungus from inhibiting your plants. To sterilize, soak in a solution of 10% bleach. You’ll also need a seed-starting soil blend or If you’re unable to find a seed-starting blend, organic potting soil will do, too. As long as the potting soil is finely milled with no debris like mulch or branches that could strangle your seeds.
Step 1: Line the tray with soil (making sure to keep the soil moist and free of debris)
Step 2: Place one seed per cell, taking care to place the seed directly in the center so that the root ball has plenty of room to form.
Step 3: Cover up seeds with more soil and flatten them out. At this time, gently water or mist your seeds. (Growing indoors means there's less heat and humidity, so watering is not necessary as often)
If the tray is heavy, the water levels are fine, but as the tray becomes lighter, more water is needed.
FYI - growing lights are an essential part of the process! Natural lights from windows cause plants to grow towards the sun, making them weak and leggy. If growing plants for 4-8 weeks a wide growing light is needed. Fluorescent bulbs are best as they offer the full light spectrum with the same benefits as the sun.
Don’t forget that plants need to be hardened before transplanting. Indoors is a much more controlled environment than outdoors, so hardening makes plants better able to withstand all the uncontrolled factors outdoors. To harden plants bring the seeds outdoors for an hour or two every day, increasing the amount of time as the plants grow.
PLANTING YOUR SEEDLINGS
To plant seedlings successfully, mark out a row, sprinkle in fertilizer, and mix well to prevent seed rot, space out seeds, and cover them with soil. If transplanting from a water well, including the root ball and remove yellow leaves. Plant with a slight indentation and minimize transplant shock by transplanting in the evenings.
SEPARATING YOUR SEEDLINGS
Last but not least; separate your seedlings.
Seedling separation can give you the most bang for your buck and can be done before or after planting. Typically, when you purchase an overseeded plant that means the plants can grow close together, but if you’re trying to cover a large area for less, the plants can also be separated.
Prep garden soil as normal . Wet both the soil and plants before proceeding and be sure to do this in the evening, both of these steps lessen transplant shock.
Knock off soil to make roots more visible and gently pull them apart in a downward motion to separate. Untangle the root ball if necessary. Be sure to water the plants thoroughly the next day.
Did you directly seed your plants already? Never fear, even directly seeded plants can be separated! Use your finger to carefully pop up the root and then follow the aforementioned process. This process works best on Mesclun Mix, Scallions, Swiss Chard, and various herbs and flowers.
With this quick guide, you should be all ready to start your own seeds for a successful Charleston gardening season!
What questions do you have about starting seeds? Let us know in the comments!